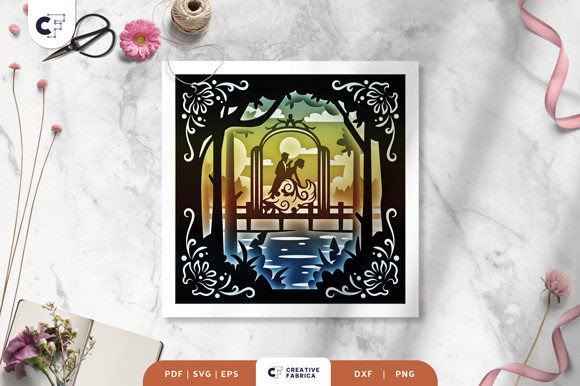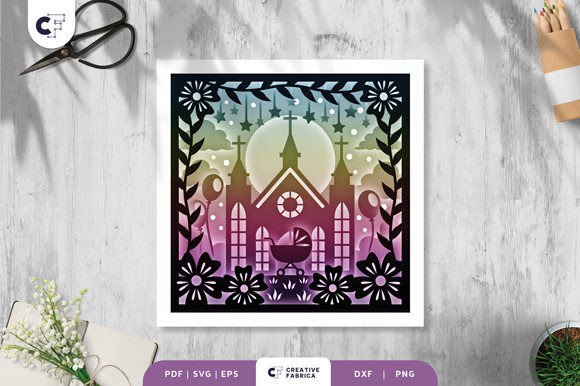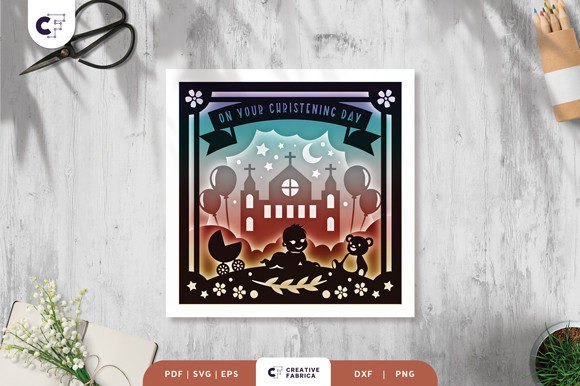
Creating a Stunning Christening Day 3D Shadow Box: A Guide to Precision and Presentation
Hello, crafters. If you are looking to create a memorable keepsake for a baptism or naming ceremony, the Christening Day 3D Shadow Box offers a sophisticated way to celebrate the occasion. This layered, square paper cutting template transforms flat cardstock into a dimensional work of art. With six distinct layers and a standard size of 20.32×20.32 cm, it provides enough depth to cast beautiful shadows while remaining manageable for most framing projects. Whether you intend to hang it as wall decoration or illuminate it as a light box with LED strips, the potential for a stunning final product is high. However, the difference between a professional-looking finish and a frustrating project often lies in the details many creators overlook before they even make their first cut.
Understanding the File Formats and Machine Compatibility
One of the most common stumbling blocks occurs right at the download stage. When you acquire this template, you receive files in SVG, PDF, EPS, PNG, and DXF formats. While having options is excellent, choosing the wrong one for your specific workflow can lead to immediate headaches. Beginners often assume all vector files behave identically across different software platforms. For instance, if you are using a Silhouette machine, the SVG file is generally your best bet for clean cut lines. Cricut users also benefit greatly from the SVG format, which preserves the layer integrity needed for a 3D effect.
A frequent mistake is attempting to use the PNG file for cutting purposes. The PNG included is typically a raster image meant for preview or printing reference, not for guiding a blade. Trying to cut based on a PNG can result in jagged edges and lost detail, ruining the delicate nature of the christening design. Always verify that you are importing the vector file (SVG, DXF, or EPS) into your cutting software. If you do not own a digital cutting machine, do not feel excluded; the PDF is perfectly suitable for printing and hand-cutting with an art knife or scissors, though it requires more patience and a steady hand to maintain the precision of the six layers.
The Critical Importance of Aspect Ratio and Sizing
Customization is a huge part of the crafting appeal, but it is also where many projects go off the rails. The template is designed at 20.32×20.32 cm, but you may wish to resize it to fit a specific frame you already own. Here is the golden rule: you must keep the same aspect ratio. It is tempting to stretch the design slightly to fill a rectangular frame or to compress it to fit a smaller space, but doing so will distort the typography and the graphical elements. A stretched "Christening" text or a warped dove symbol immediately signals a lack of attention to detail.
Furthermore, consider the implications of scaling on the structural integrity of the paper bridges. This design relies on tiny connections of paper to hold the intricate layers together. If you scale the design down too aggressively without adjusting your blade depth or pressure, these fine bridges may tear during the weeding process. Conversely, scaling up too much might require a heavier cardstock than recommended to prevent sagging, especially if you plan to mount it vertically. Before resizing, measure your intended frame's internal dimensions and calculate the maximum size that allows for a border, ensuring you never compromise the design's proportions.
Selecting the Right Materials for Durability and Depth
The choice of material can make or break the 3D illusion. The design specifies the use of Encore Cardstock 80 lb cover 216 gsm. Ignoring this recommendation is a costly error. Using standard printer paper or lightweight scrapbook paper (below 65 lb) will result in a flimsy structure that cannot support its own weight between layers. The shadows will be weak, and the layers may bow or curl over time, destroying the crisp look of the shadow box. On the other hand, going too heavy with chipboard or thick watercolor paper can jam your cutting machine and make the intricate inner details impossible to weed out without tearing.
Color selection is another area where intuition can sometimes mislead. While white-on-white is a classic, pristine choice for christenings, it offers the lowest contrast. If your lighting is poor, the layers may blend together, hiding the effort you put into the assembly. Consider using very subtle tonal variations—such as ivory, cream, or pale silver—to define the layers while maintaining a soft, sacred aesthetic. If you decide to visit a 12×12 Cardstock Shop to purchase materials, remember that the actual final product color may slightly vary due to lighting sources and screen calibration. Always order a small sample pack if you are aiming for a specific shade match to avoid disappointment upon arrival.
Assembly Techniques for a Flawless Finish
Once your six layers are cut, the assembly phase begins. This is where the project transitions from a collection of paper shapes to a cohesive piece of art. A common oversight is the type of adhesive used. Regular liquid glue can warp thin cardstock, creating bubbles and wrinkles that are visible once the frame is closed. For a Christening Day 3D Shadow Box, foam tape or double-sided tape squares are superior choices. They provide the necessary spacing to create the shadow effect while keeping the layers parallel and flat.
When assembling, work from the background layer forward. Align the registration marks carefully; even a millimeter of drift can throw off the symmetry of the entire piece. If you plan to convert this into a light box by adding LED strips between the layers, test your lighting setup before gluing everything down permanently. LEDs generate heat, and enclosing them too tightly without ventilation or using non-heat-resistant adhesives can cause issues over time. Ensure the wires are tucked neatly behind the layers so they do not disrupt the visual flow of the design.
Final Checks Before Framing
Before you seal your creation in its frame, take a moment to inspect it under different lighting conditions. Look for any stray fibers from the cutting process or tiny bits of adhesive that might have oozed out. Dust trapped inside a sealed shadow box is incredibly difficult to remove later. Additionally, ensure that the frame you select has enough depth to accommodate all six layers plus the spacing material. A standard photo frame often lacks the necessary depth, leading to the glass pressing against the top layer and flattening your 3D effect.
This project serves as a thoughtful gift for friends, family, or someone special, representing a milestone moment with elegance. By paying attention to file formats, respecting aspect ratios, choosing the correct cardstock weight, and utilizing proper assembly techniques, you ensure the final result honors the significance of the day. Crafting is about more than just following instructions; it is about understanding how materials and methods interact to produce quality. Take your time, verify your settings, and enjoy the process of bringing this beautiful template to life.